Sensory Magnus for Windows help
Everything you need to set up and use the free Magnus screen magnifier on Windows 11, on one page.
Sensory Magnus for Windows is a free screen magnifier for Windows 11, built on the Windows Magnification API. It has six view styles, 32 zoom levels up to 8×, and separate colour tints for the magnified area and the background. Download it free from the Microsoft Store.
Looking for the iPhone app? See using Magnus on iPhone and iPad. Text-to-speech is covered in Magnus Reader (coming soon).
Magnification styles
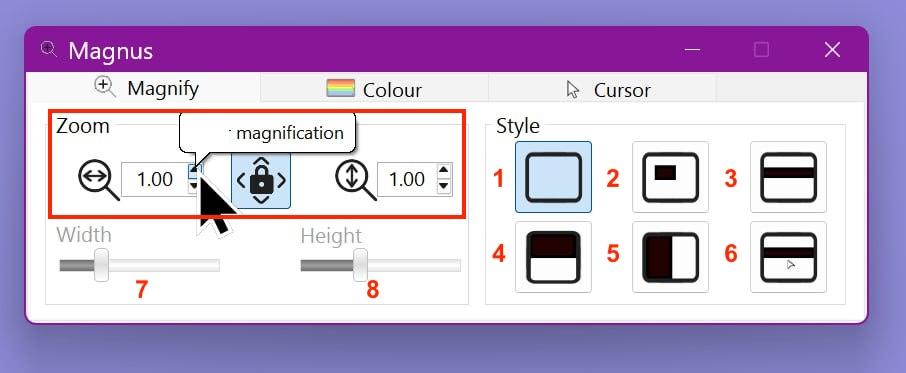
The Magnus magnification settings panel showing all view styles.
Magnification level can be set independently for horizontal and vertical axes by unlocking the padlock control in the centre of the magnification level controls.
View Styles
Style 1 — Full Screen Magnifier
Magnifies the entire screen from 1 (no magnification) to 8×, in 0.25 increments.
Style 2 — Lens
A magnification lens follows your mouse pointer. Adjust lens width and height, apply a tint inside, and set a contrasting tint outside — bringing magnified focus while removing distractions.
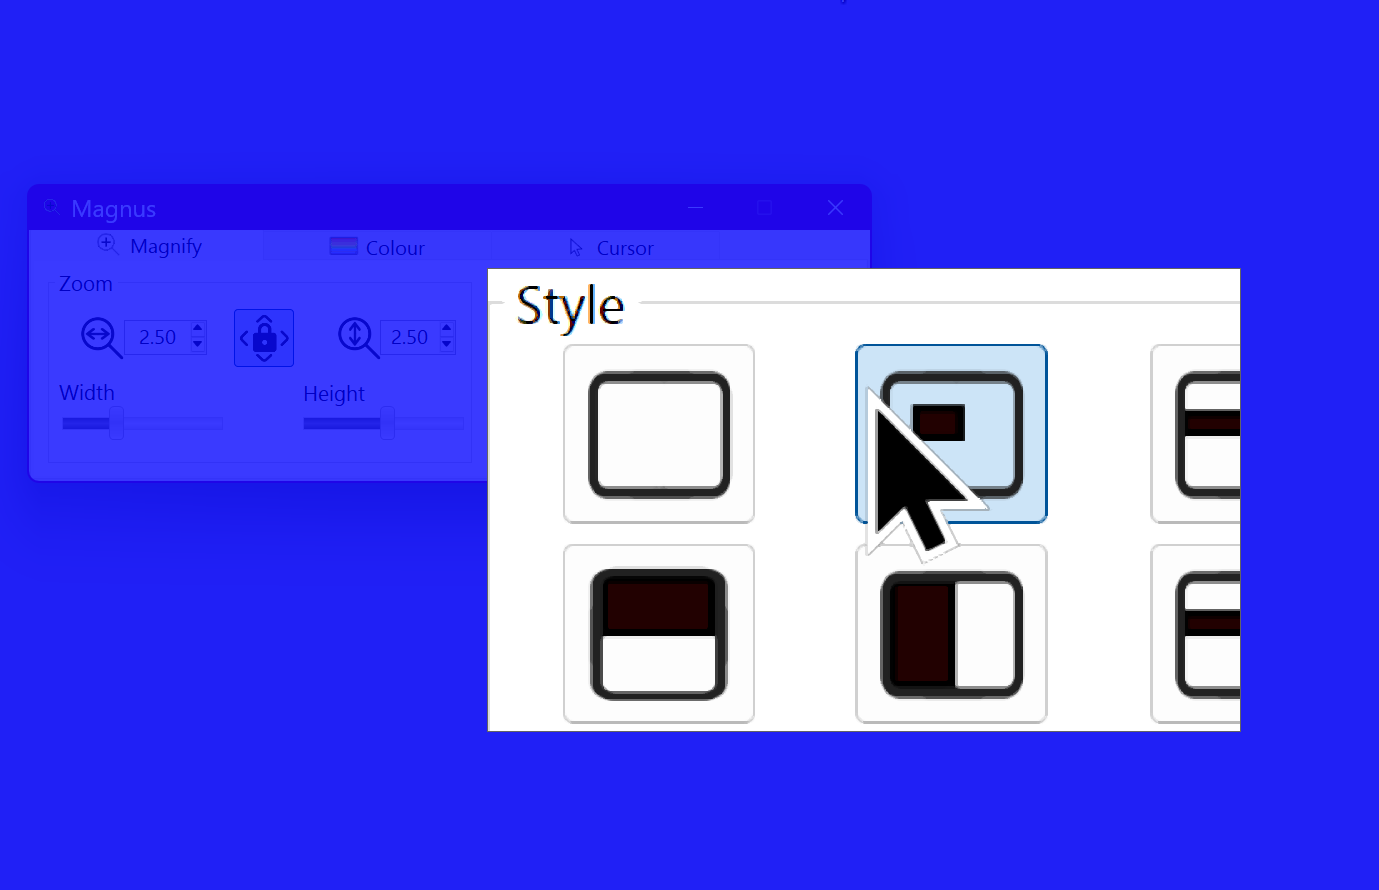
The Lens style with a royal blue contrast tint applied outside the lens area.
Style 3 — Ruler
A magnifying ruler follows your cursor up and down the screen. The ruler height is adjustable, and both the ruler area and surrounding region can be independently tinted.

The Ruler style with yellow tint inside and plum contrast outside.
Styles 4 & 5 — Split Screen
Split the screen horizontally or vertically. Navigate a document in a "zoomed out" view while the area under the mouse appears at your preferred magnification in the other pane.
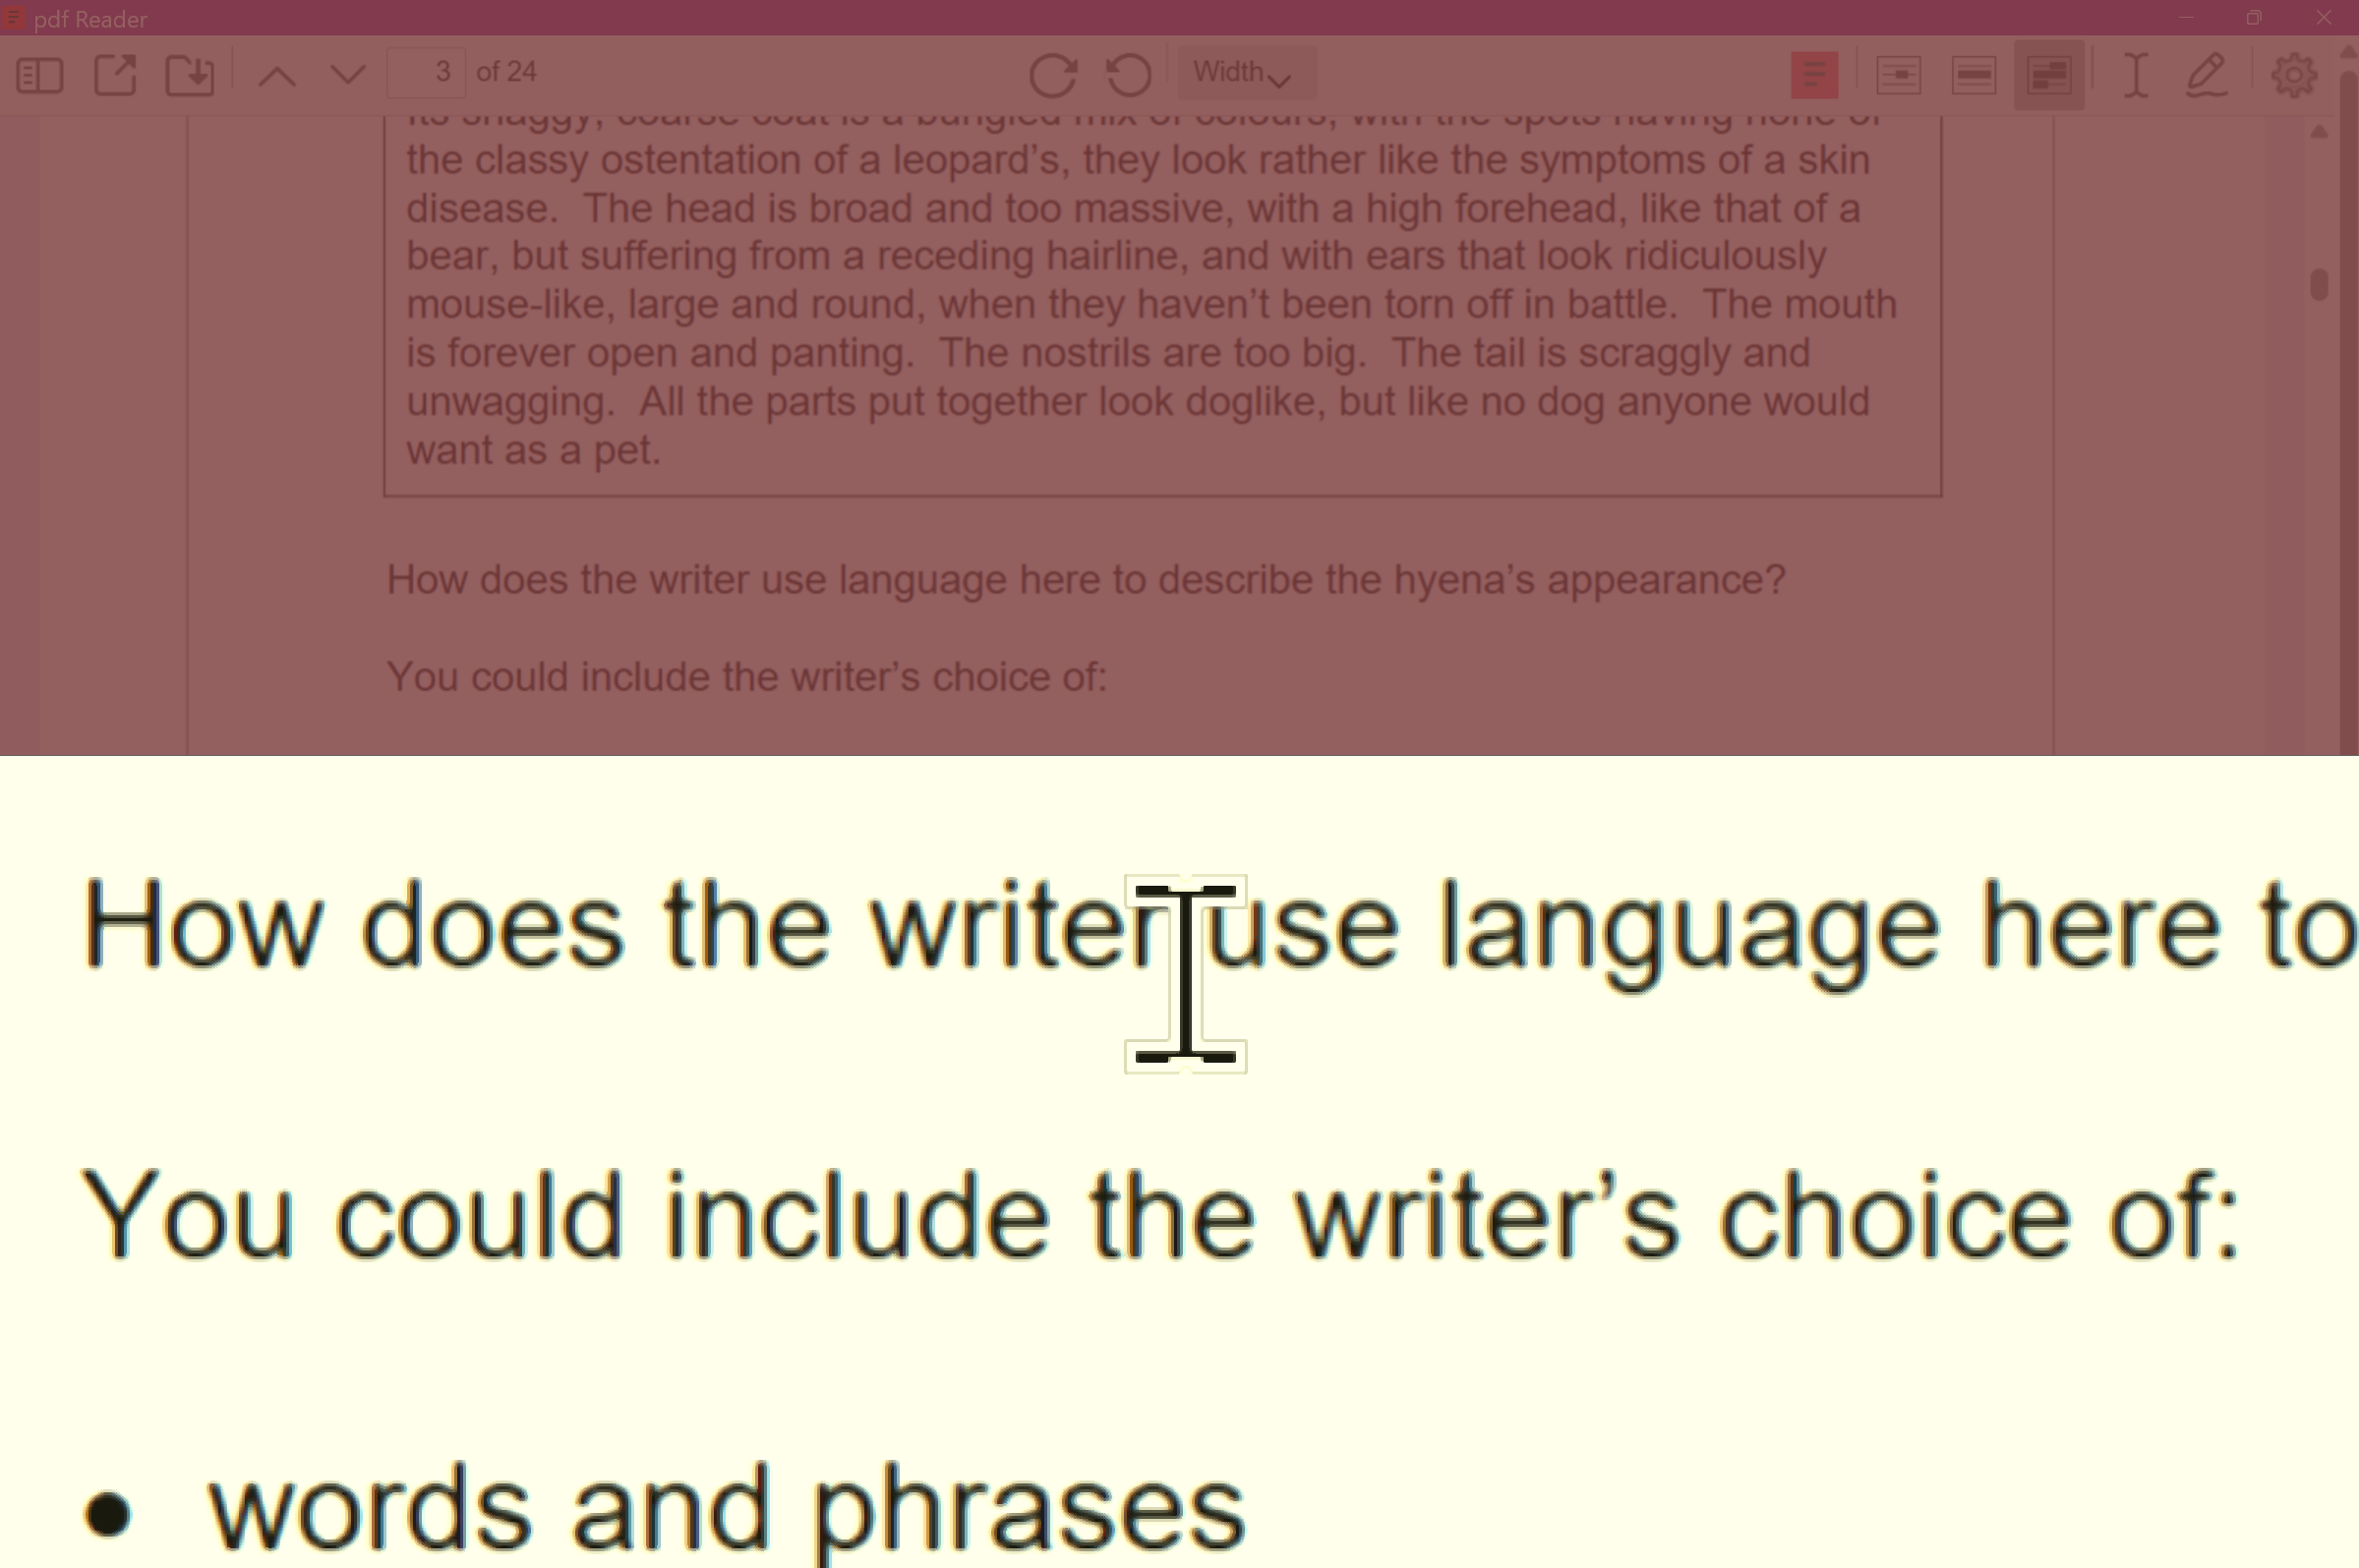
Horizontal split: yellow tint in the magnified section, plum contrast on the full-size view.
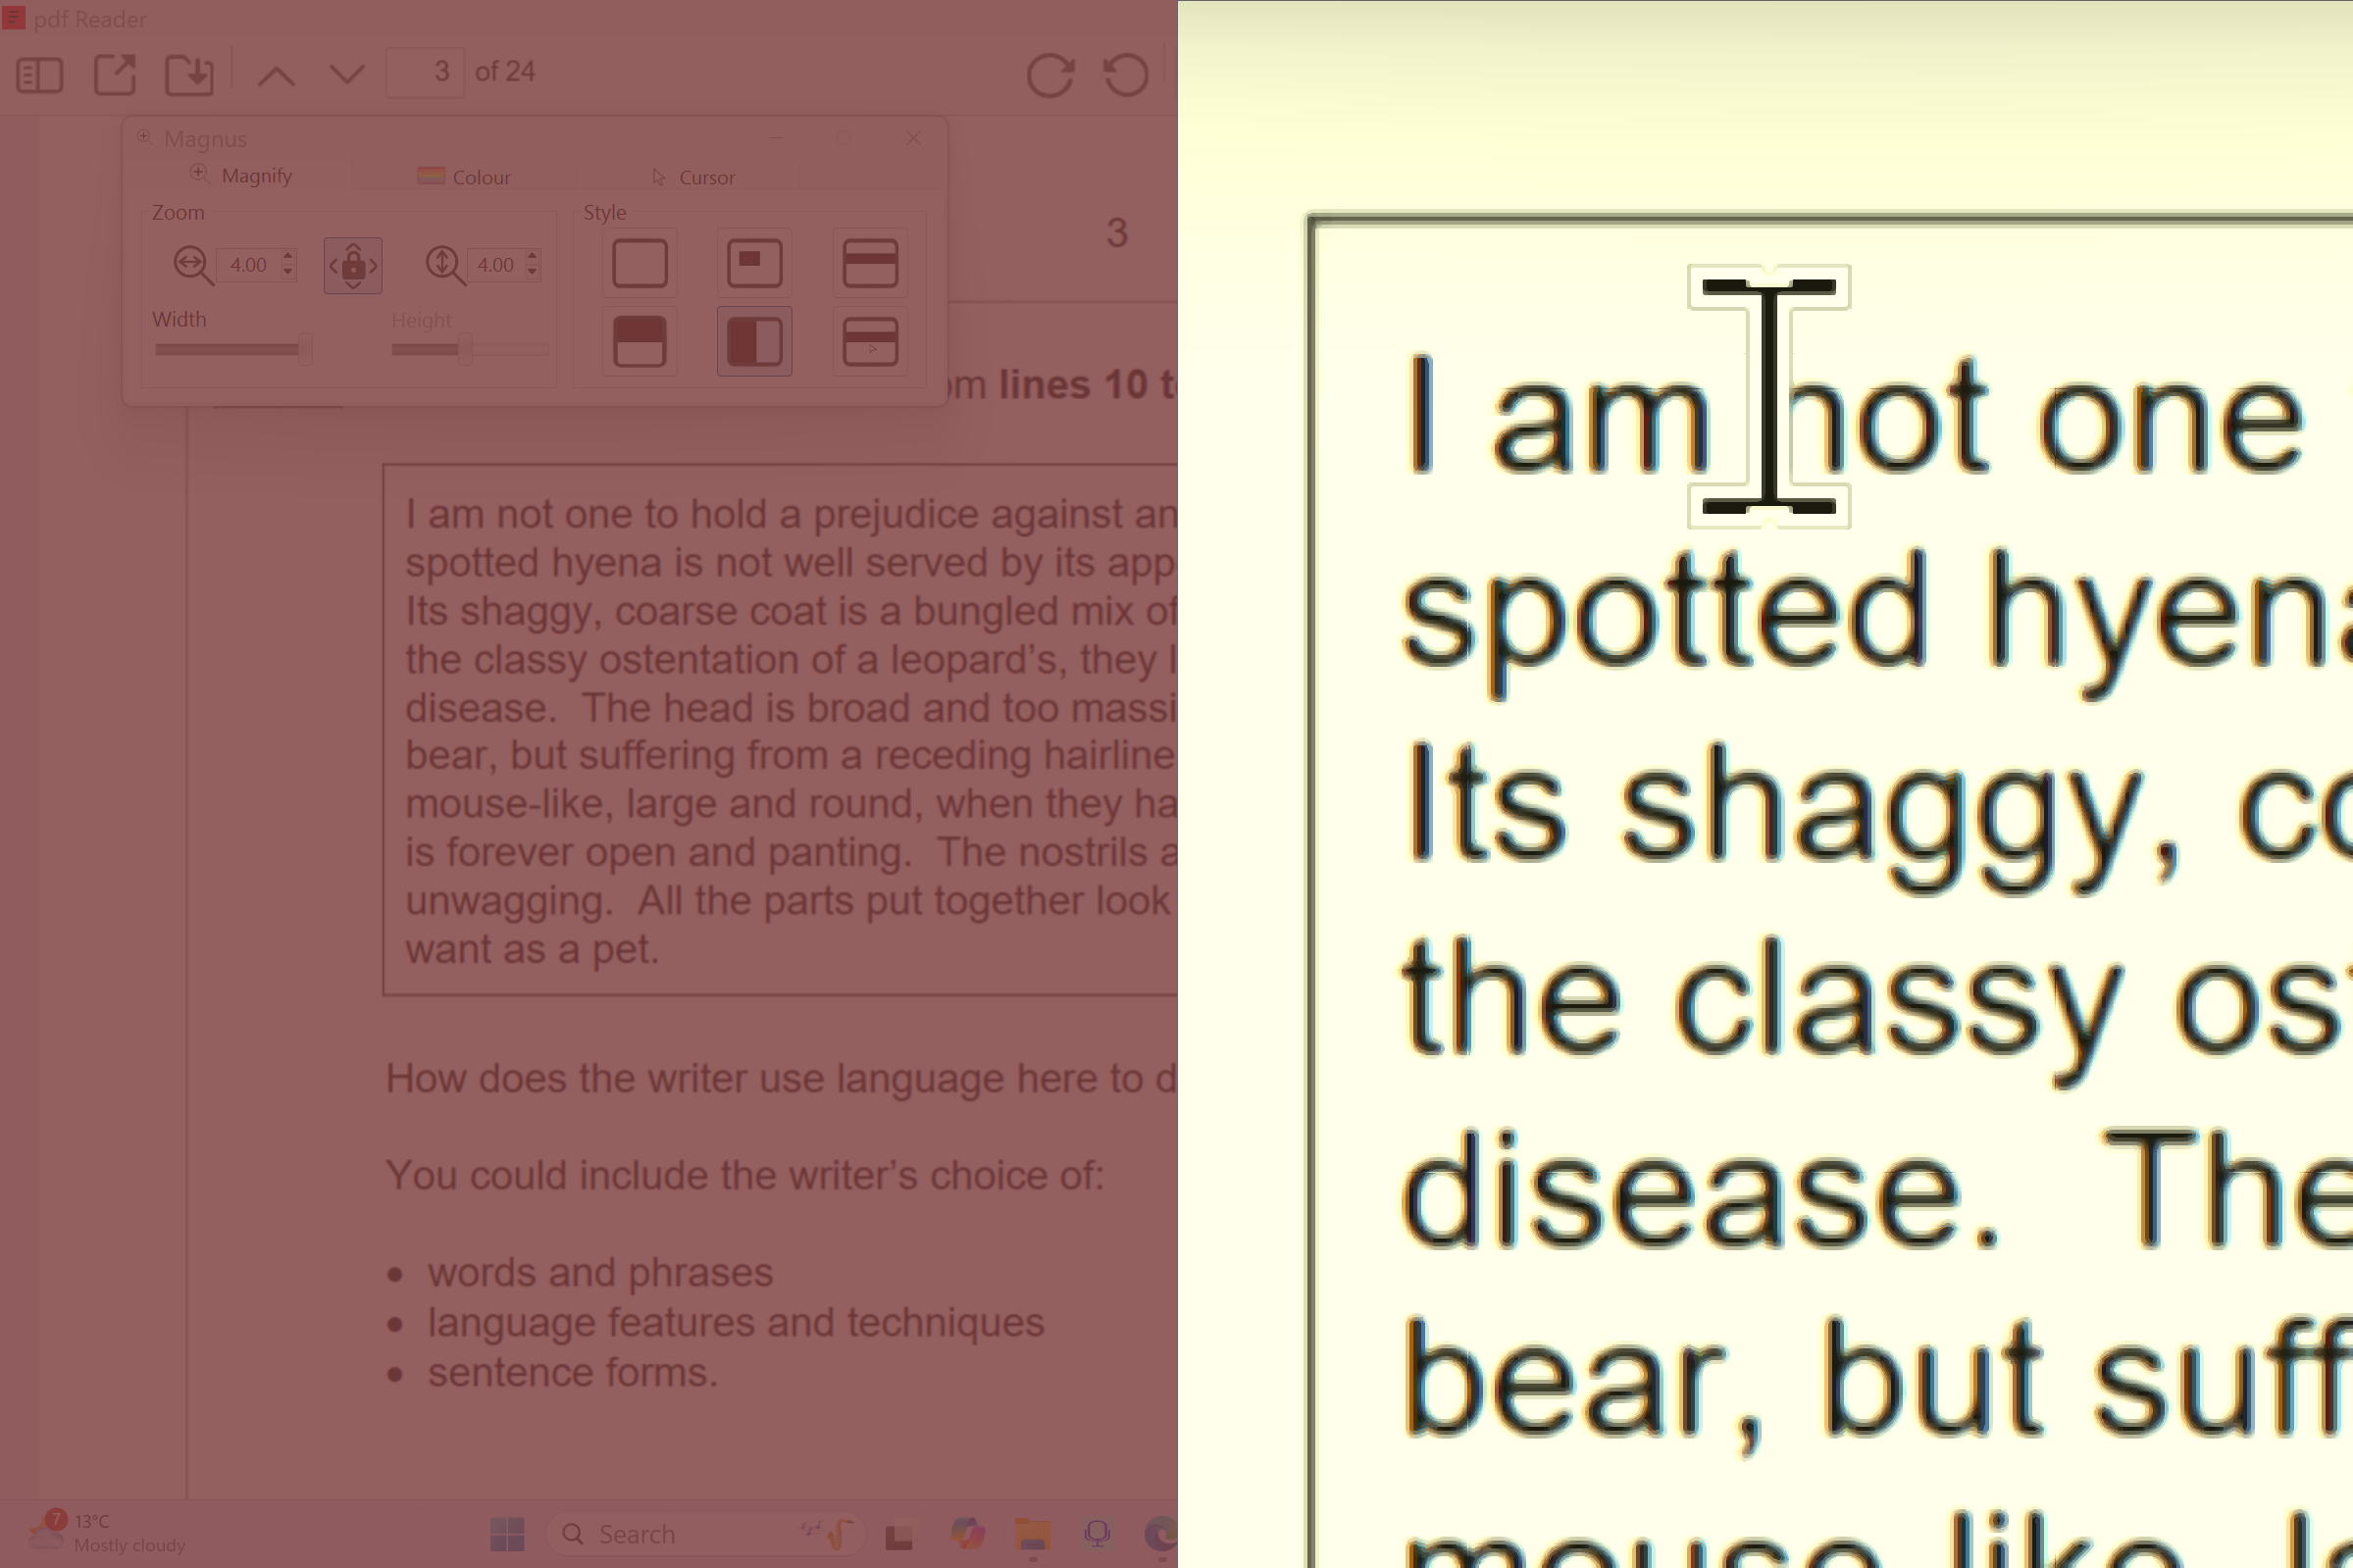
Vertical split: left/right pane arrangement.
Style 6 — Offset Ruler
Like the Ruler, but offset from the mouse position so the magnified view doesn't obscure what you're pointing at.
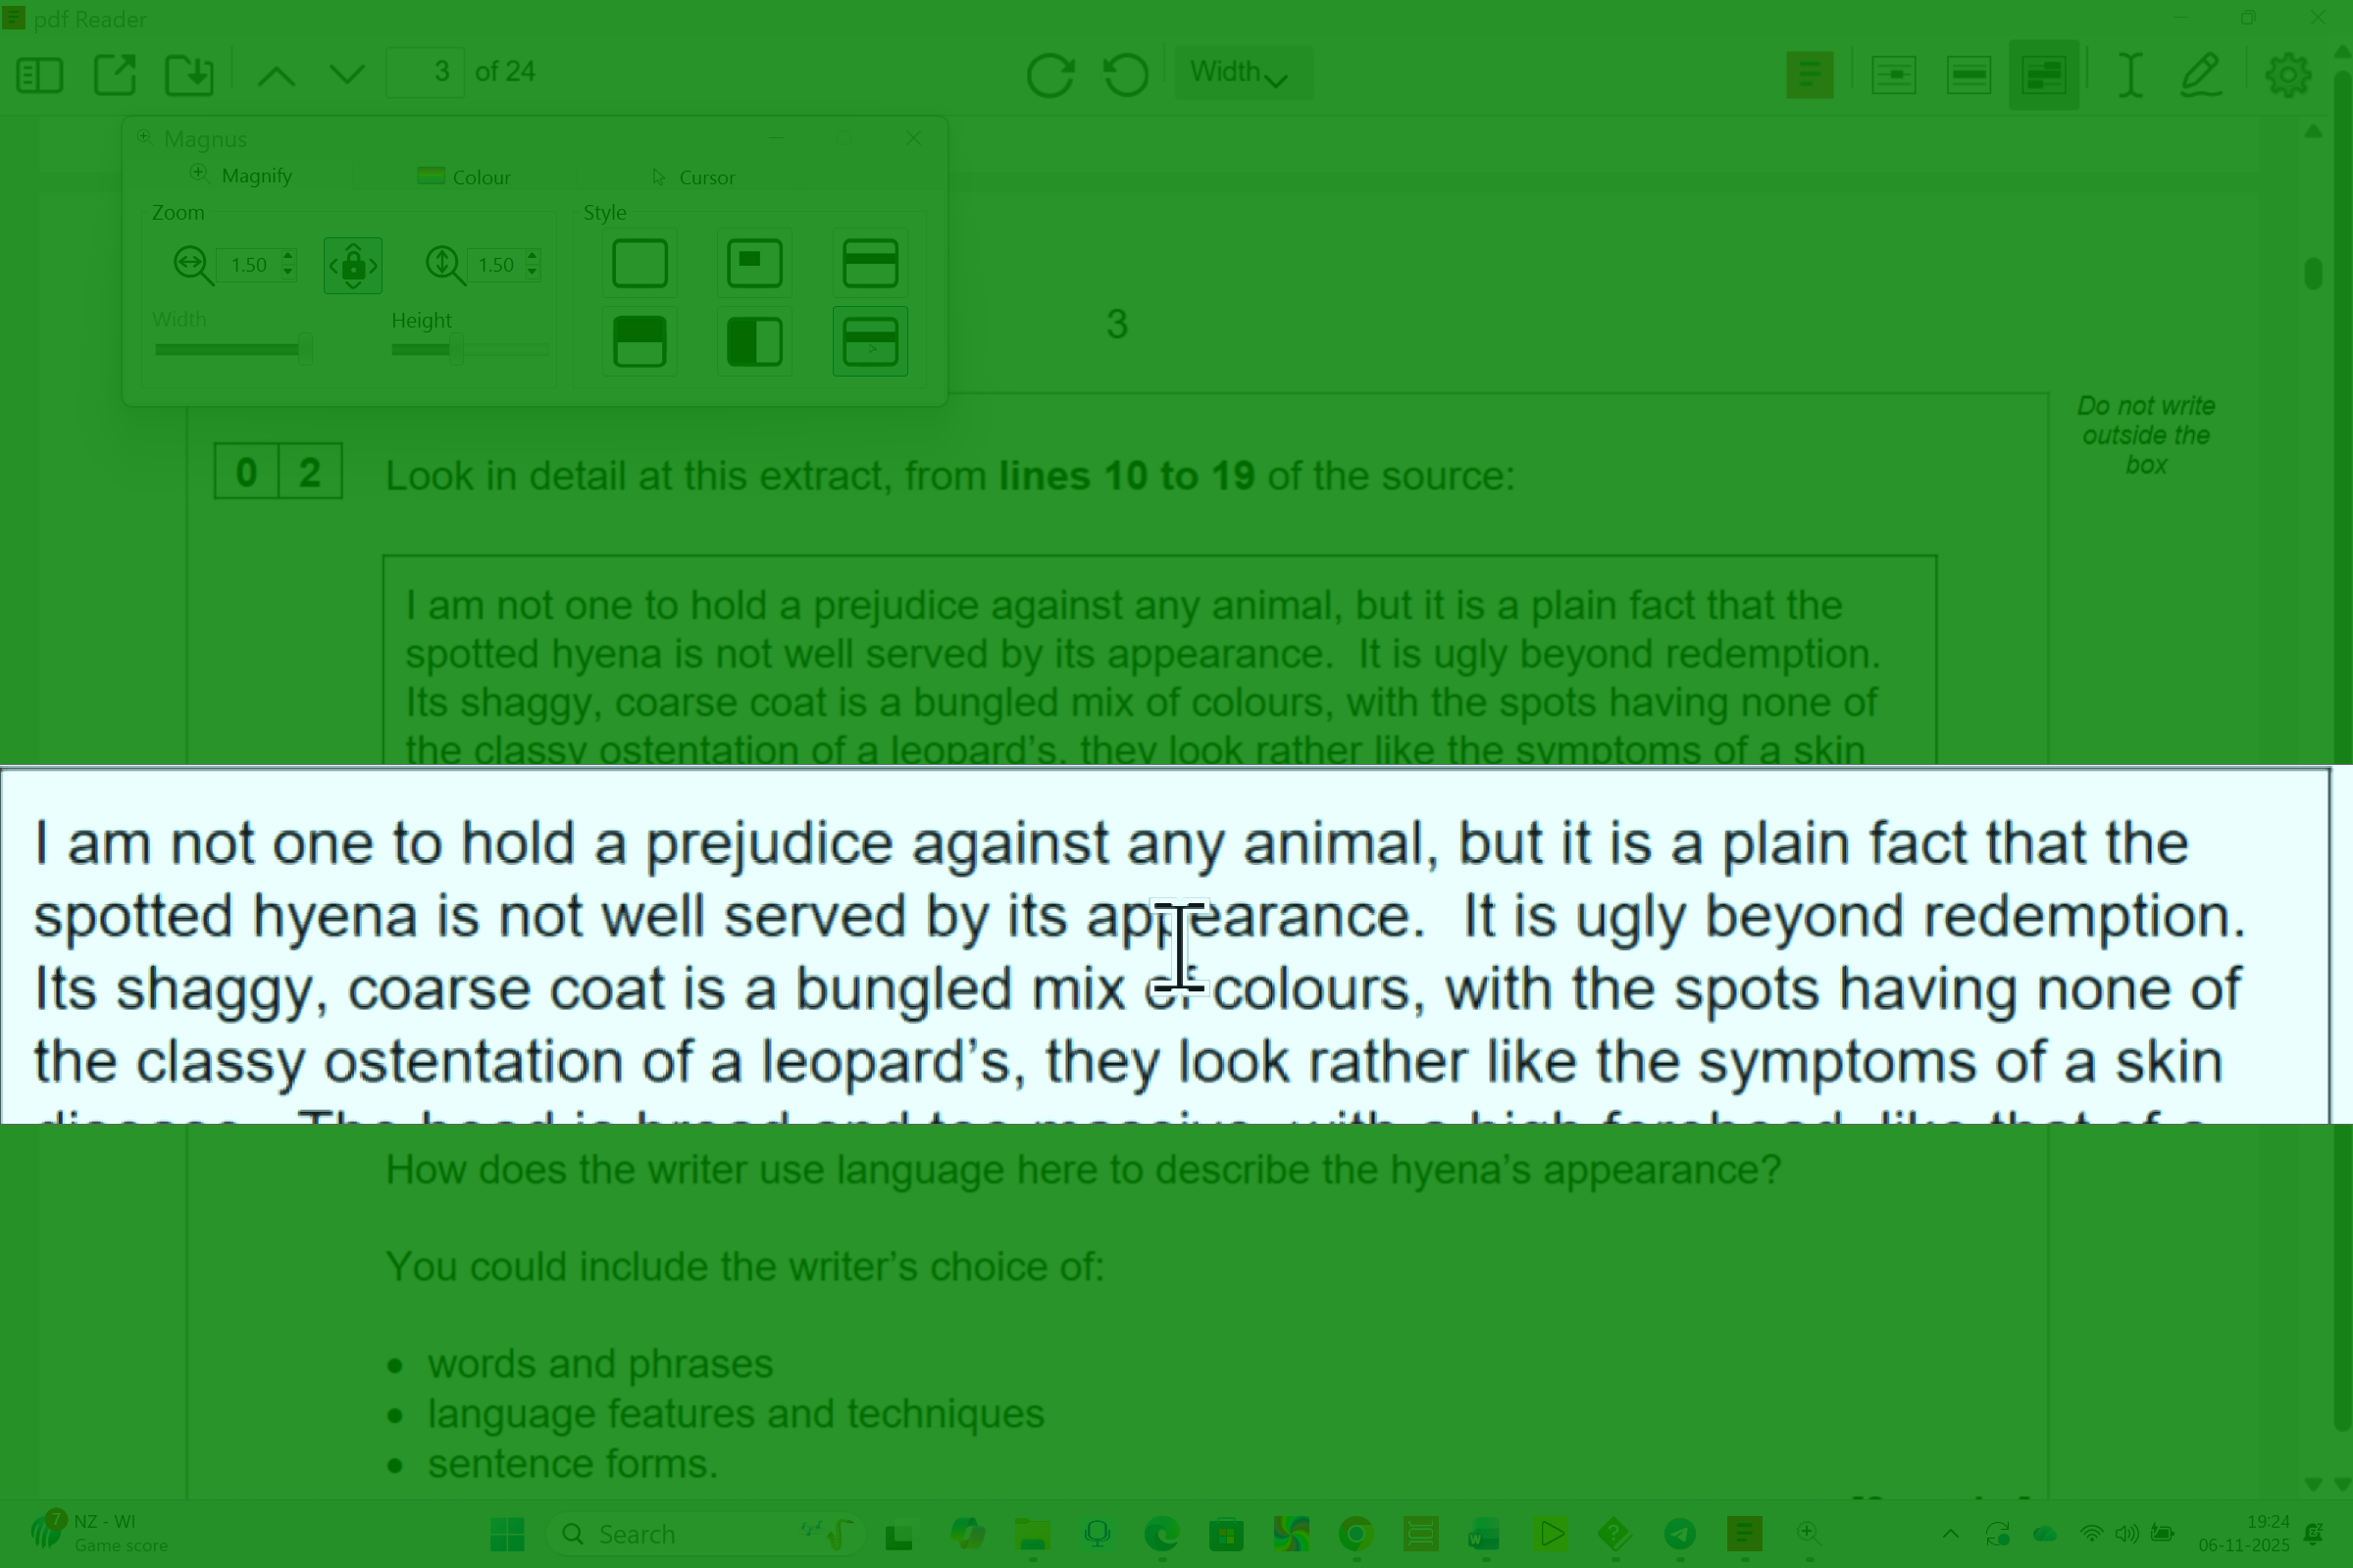
The Offset Ruler with light blue tint inside and green contrast outside.
Keyboard Shortcuts
| Shortcut | Action |
|---|---|
| Ctrl+Shift+→ | Increase magnification level one step |
| Ctrl+Shift+← | Decrease magnification level one step |
| Ctrl+Shift+Tab | Cycle through all 6 magnification styles |
Colour tinting
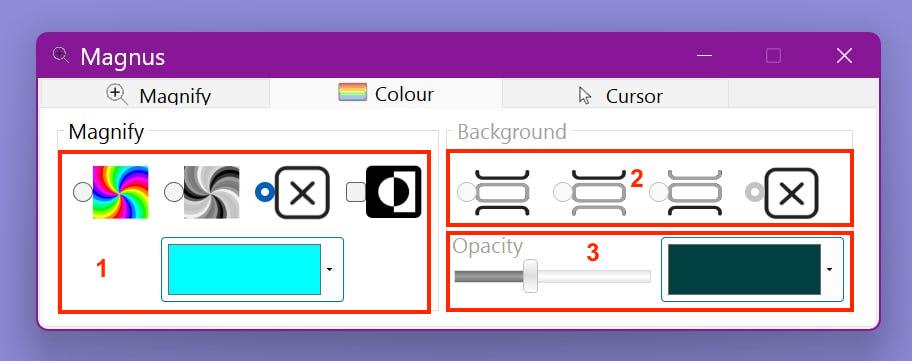
The Magnus colour tint options panel.
Magnus allows colour tints for two independent areas. The first area is around the mouse — lens, ruler, or full screen. The background is the region outside the lens, split, or ruler.
Section 1 — Tint for Lens, Ruler, or Full Screen
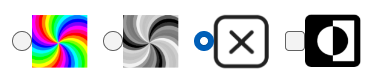
Controls for the tint applied inside the lens, ruler, or full screen area.
Set to ✕ for no tint. Set to the colour wheel icon to apply a tint, then choose a colour from the dropdown.
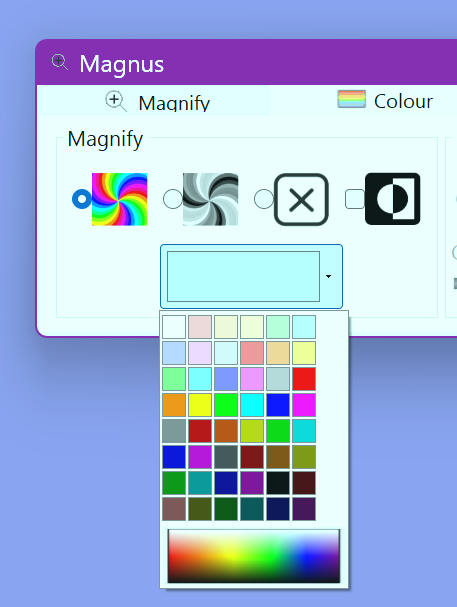
The colour tint dropdown showing available overlay colours.

The Ruler in inverted colour mode — white text on dark for high contrast.
Section 2 — Background Tint Coverage
Controls where the background tint is applied. Inactive when using Full Screen mode.

Options for where the background tint is applied relative to the lens or ruler.
- Option 1 — Background tint above and below the lens or ruler
- Option 2 — Background tint above only
- Option 3 — Background tint below only
- Option 4 — No background tint
Section 3 — Background Tint Colour & Opacity
Select the background tint colour and adjust opacity from fully solid to completely see-through.
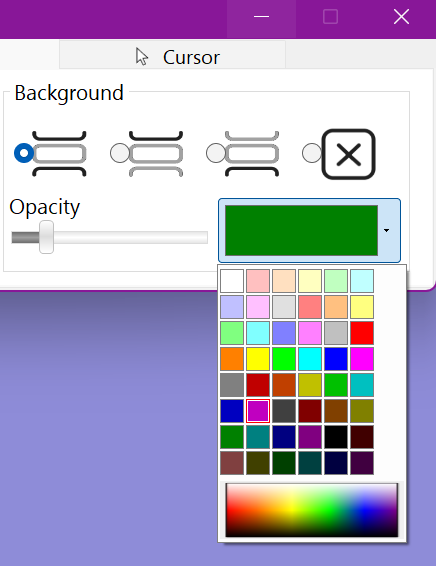
Background tint colour and opacity controls.
New to screen tints? Read our guide to coloured overlays and screen tints.
Cursor and text size
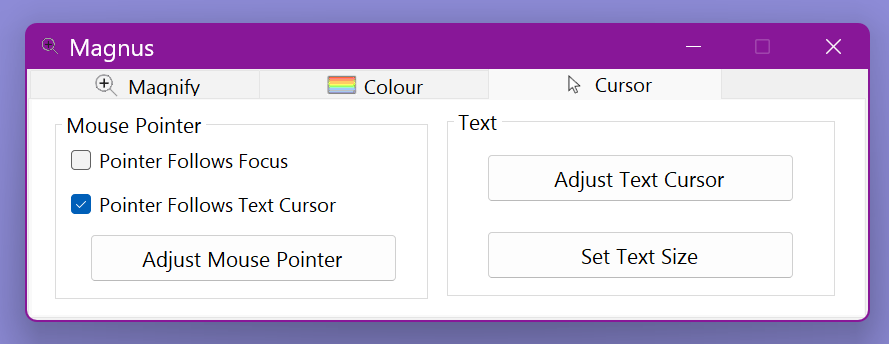
The Magnus cursor settings panel with links to Windows accessibility options.
- Mouse Pointer — change pointer size, colour, and style
- Text Cursor — adjust cursor thickness and colour
- Text Size — increase text size across Windows applications
Mouse pointer
Increase the pointer size and choose a colour scheme to make it easier to see on screen.
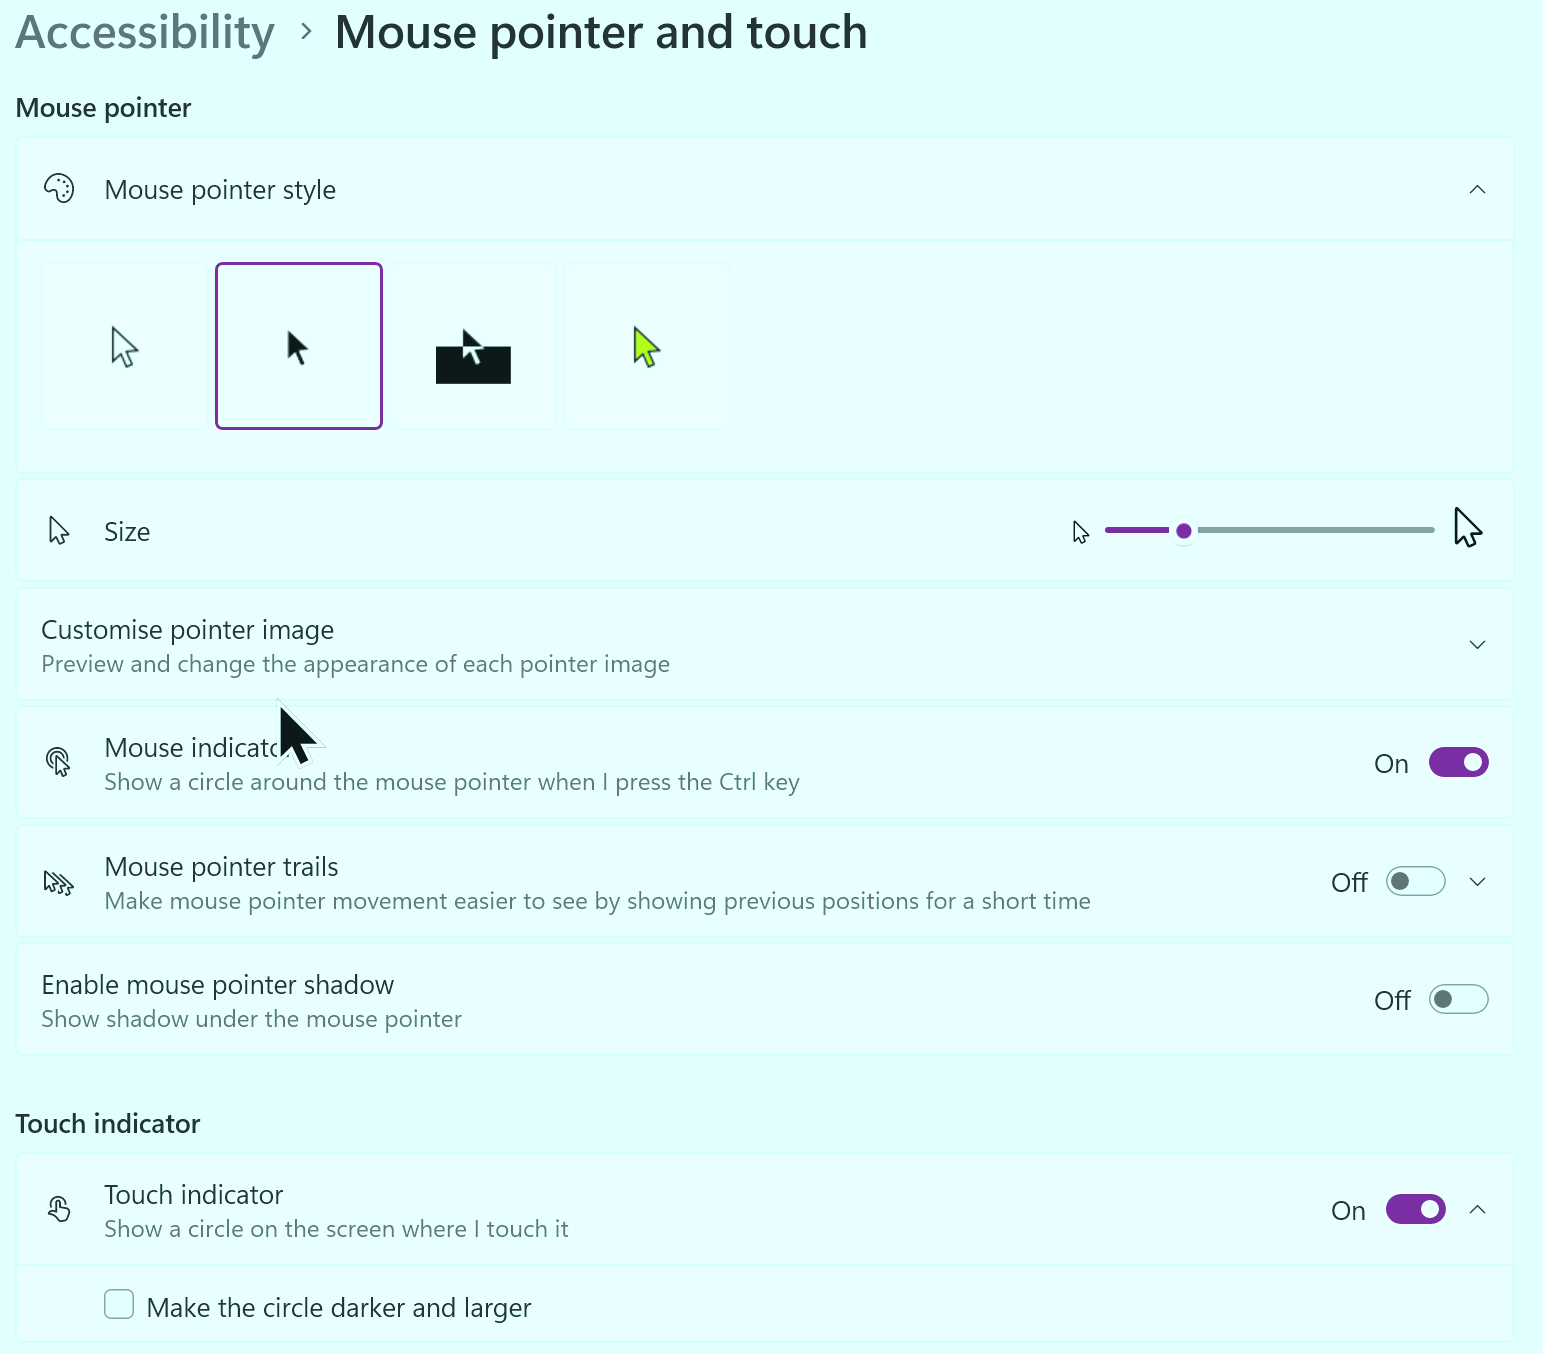
Windows mouse pointer accessibility settings, opened from within Magnus.
Text cursor
Increase cursor thickness and add a colour indicator to make it easier to locate while typing.
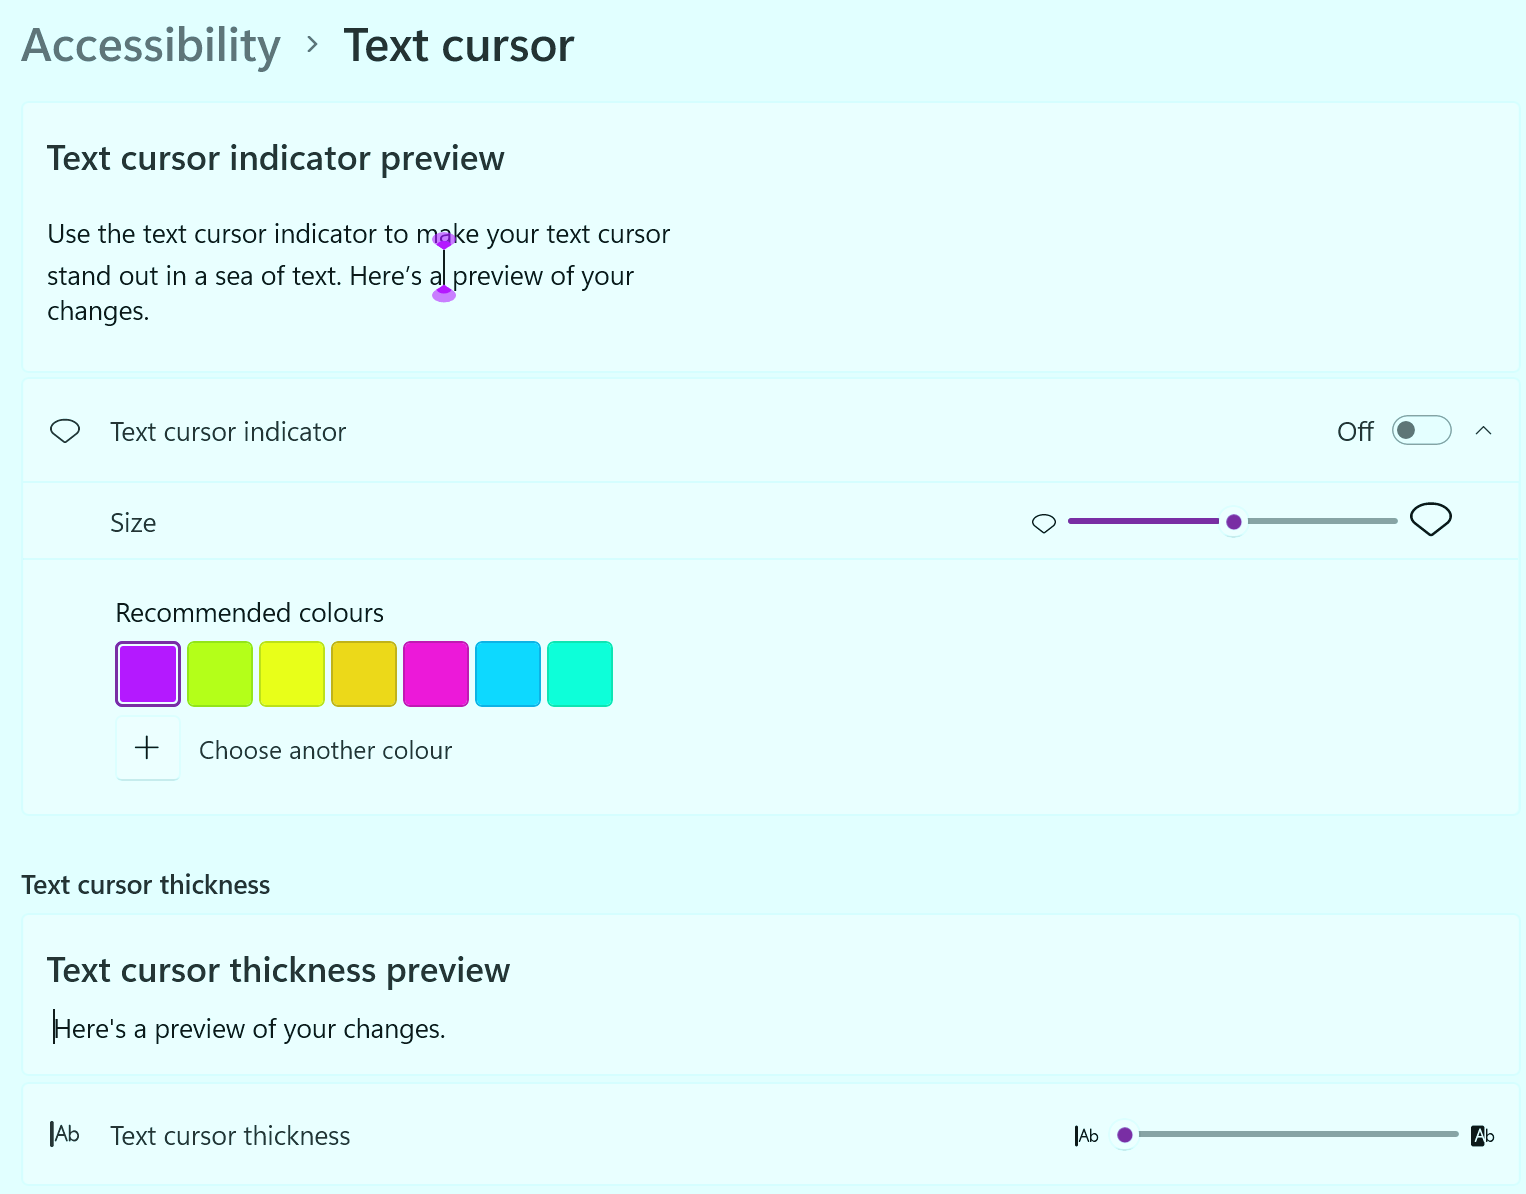
Windows text cursor accessibility settings, opened from within Magnus.
Text size
Increasing the text size here makes text larger throughout Windows and most applications, complementing Magnus magnification.
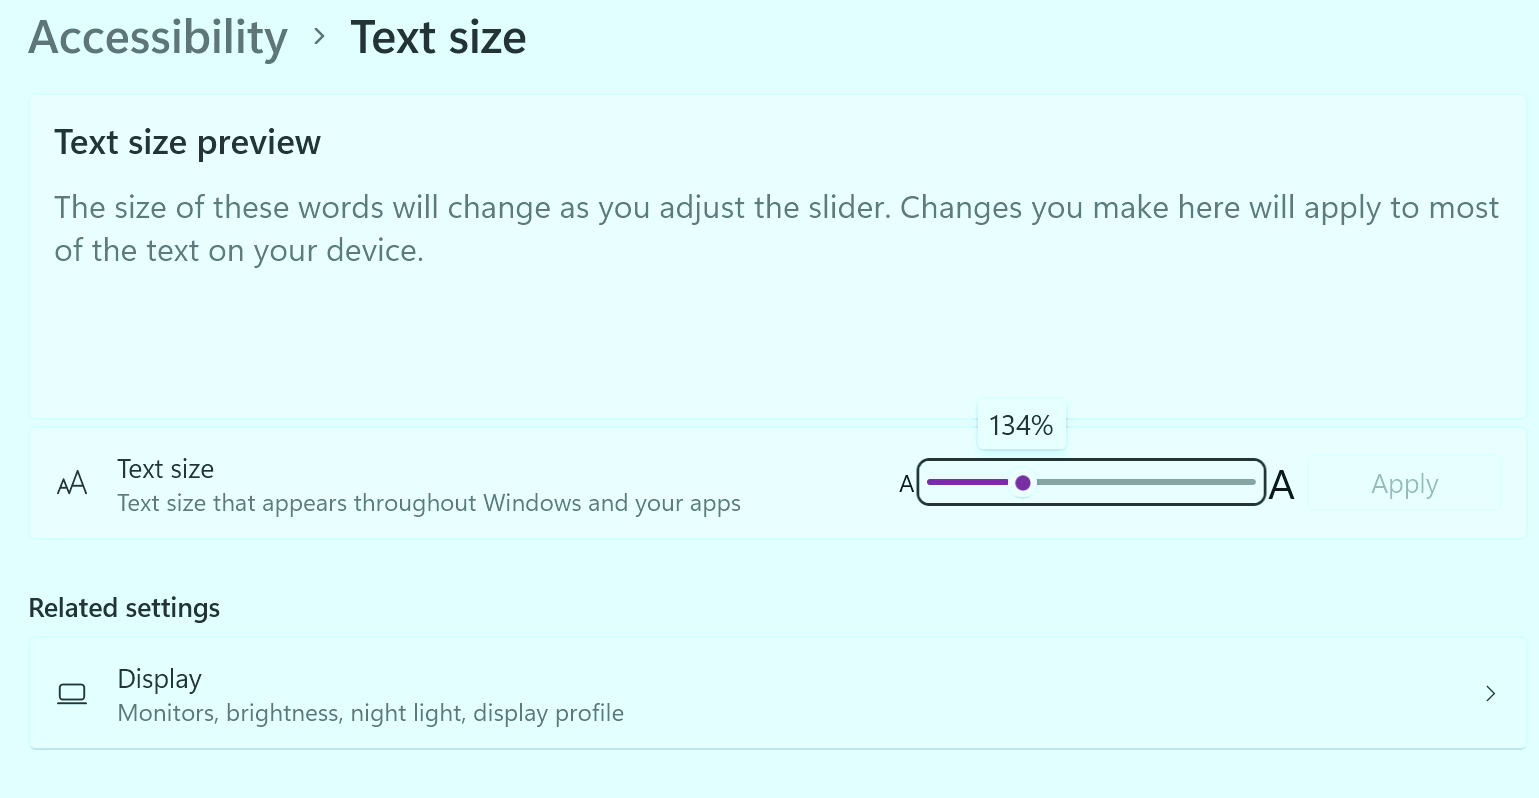
Windows text size accessibility settings, opened from within Magnus.
Run Magnus at Windows sign-in
Sensory Magnus registers itself with the Windows Ease of Access Centre on installation. You can configure it to run outside the login screen and start automatically when you log in.
Step-by-step setup
-
Open the Windows Control Panel. Type Control Panel into the Windows Search box.
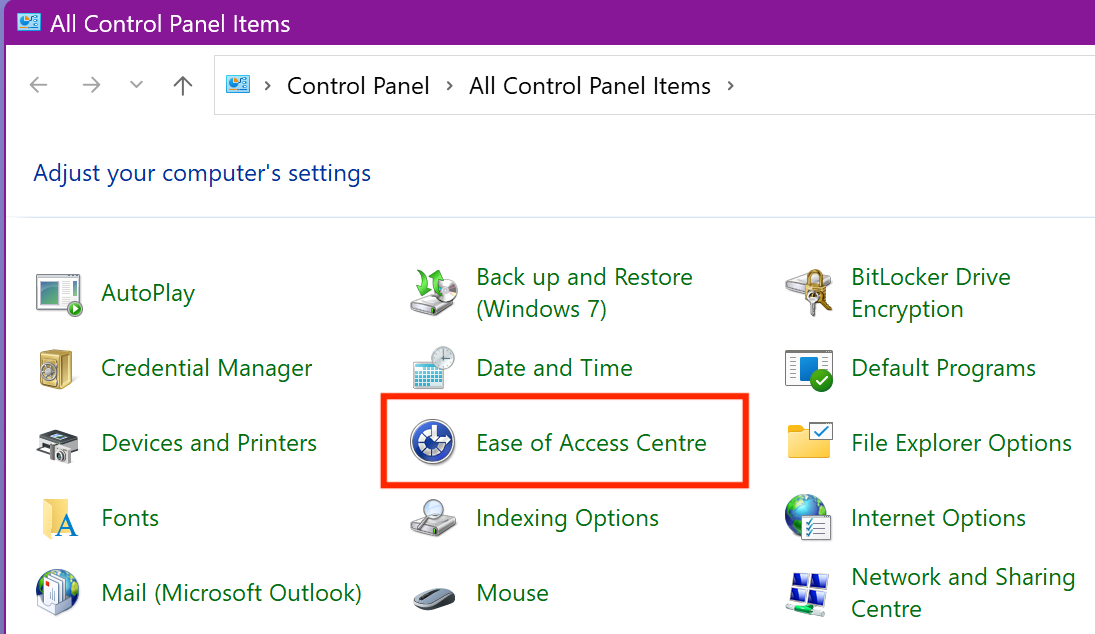
Finding the Control Panel via Windows Search.
-
Open the Ease of Access Centre and select "Change Sign-in settings".
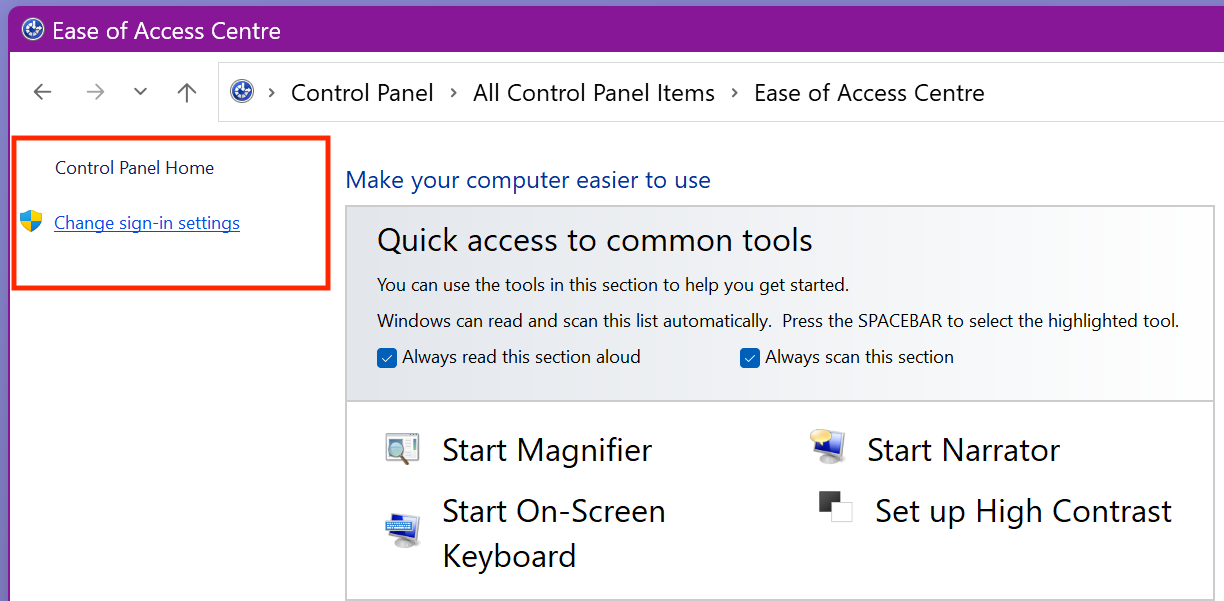
The Ease of Access Centre with "Change Sign-in settings" highlighted.
-
Tick "Magnifier (Magnus)" for At sign-in and/or After sign-in.
- At sign-in — runs Magnus on the Windows login screen, before you log in
- After sign-in — Magnus starts automatically on login, loading your personal settings
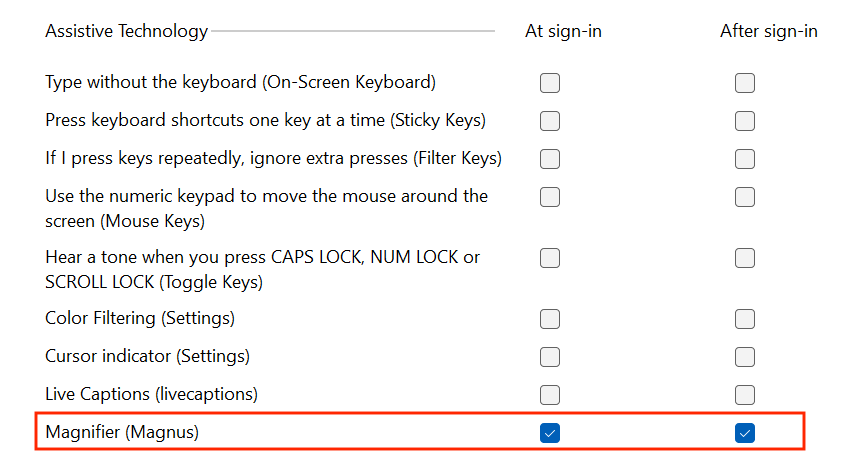
Ticking the Magnus setting for at sign-in and after sign-in.
Requirements and support
| Platform | Requirement |
|---|---|
| Windows | Windows 11, 8 GB RAM or more recommended. Free from the Microsoft Store. |
| iPhone | iOS 18.6 or later. Free from the App Store. |
| iPad | iPadOS 18.6 or later |
| Mac (iPhone app) | macOS 15.6 or later, Apple M1 chip or later |